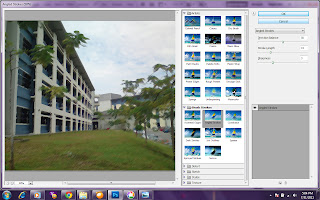
(1) For creating the new one, I need to save it first and naming is as e-wallpaper. Change to International paper then for the background contents choose the transparent. The image above I choose as background for the e-wallpaper. Before move it, I go to eraser tool -> magic tool -> free transform.
(2) I am using photoshop to change the background and make it more effect. For do this, go to filter -> brush strokes -> dark strokes.
(3) Grab the e-Bee use magic eraser tool -> click at the white paper -> click move tool -> free transform to edit and re-size. To make it different from the original e-Bee, I change it. Go to filter
-> artistic -> sponge.
(4) The picture above is a classic letter. To make it more classical, I change the tone design whereas we can take it from the right side tools. I've take night tool -> take posterize.
(5) The books also I've change to make it better. Go to filter -> sketch -> choose water paper.
(6) For the MMU external view as usual I've change the texture. Filter -> texture -> texturizer.
(7) For FOM building also I've using the same tool to make it different from the previous picture. Go to filter -> brush strokes -> angled strokes.
* For the graduation hat picture, MMU logo and TM logo I am just use the same tool where to grab and move picture. The instruction is take magic eraser tool (E) -> click at the white paper -> then click move tool -> moving the picture -> go to free transform to edit and resize the picture.
* The words also I just using the Text tools in the left side tool. Select horizontol type tool. From there I can select any different style of font and font size in making text that what I want it. Then all of the picture and text I put and combine it in the background then just edit it to become more nicely.
* Okey that is what I've learn from photoshop and doing my e-wallpaper project.
~ The End ~ ^_*


No comments:
Post a Comment